Screen porch, patio or deck screening projects are far less complicated when using SNAPP screen.
This page explains how to install SNAPP screen.
Also be sure to see additional instructions for specialized applications including gazebos, columns, arches, etc.
All link are available via in the drop down menu above.
Most installations can normally be performed by one person of average skill with no special tools.
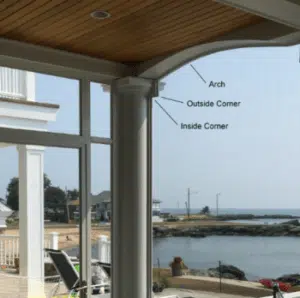
Inside corner, Outside corner, Arch
(PVC shown)
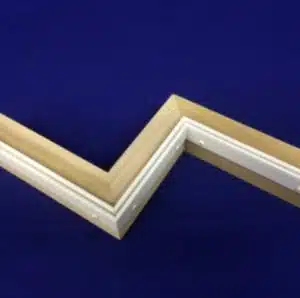
Inside corner, Outside corner (PVC shown)
Mounted
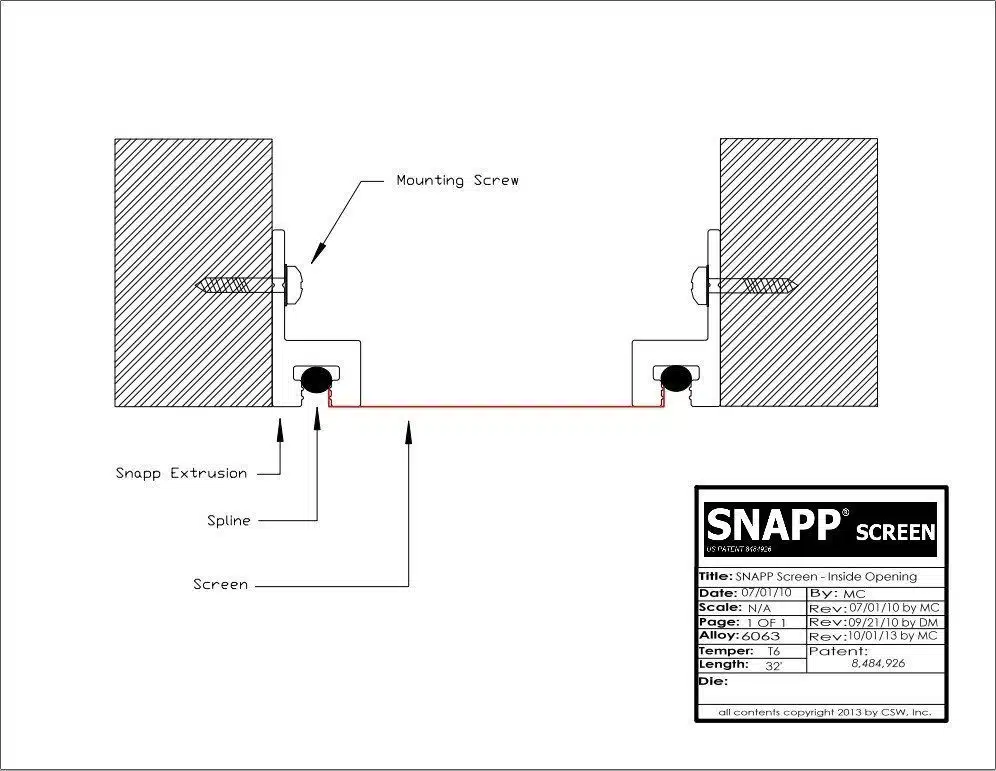
Inside Opening
Mounted
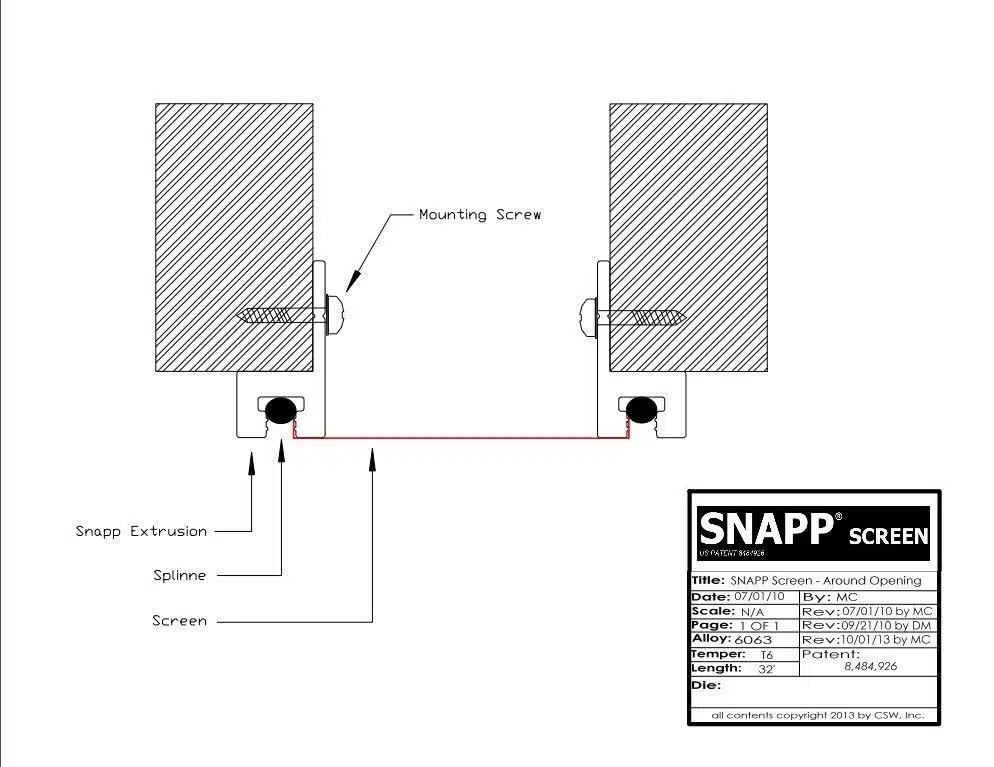
Around Opening

Mounted Into
Partial (1 Step) Dado
Mounted Into
Full (2 Step) Dado
- Basic Installation Instructions -
1) Cut SNAPP® screen extrusion to size and mount in place. (SNAPP® screen is a zero-waste product … extrusions can be butted together)
2) Fasten with screws or other appropriate hardware. Hardware is placed within 1" of each end and then no more than 12" apart thereafter.
3) Install SNAPP® screen Polyester Screen Material (or any standard fabric screen materials) using SNAPP® screen spline and SNAPP® screen spline installation tool.
- Full Step by Step Instructions - How to install SNAPP® screen -
Modify all directions as needed based upon your application
Step 1: Determine the materials you’ll need to order:
- • SNAPP® screen extrusions
- • SNAPP® screen mounting screws
- • SNAPP® screen spline
- • SNAPP® screen spline tool
- • SNAPP® screen screen material
Click for your >> SNAPP screen Project Worksheet
(Worksheet has been updated to current web store)
Step 2: Ensure you have the proper tools available:
- • Measuring Tape
- • Utility knife (with extra blades)
- • Screw gun
- • Spline Installation Tool
- • Hacksaw or power chop saw fitted with an aluminum/plastic cutting blade. (We find the Freud Diablo series aluminum/plastic cutting saw blade to be one of the best to use - 80 or 96 tooth – based on blade size required. Available at any home center)
Step 3: Determine how you intend to mount (“inside” or “around” opening) (“miter” or “butt” corners)

Mount Inside Opening - Butt Corner
Mounted inside the opening with butt corner. Mount facing outwards, inwards, or at any depth within the opening.

Mount Inside Opening - Miter Corner
Mounted inside the opening with miter corner. Mount facing outwards, inwards, or at any depth within the opening.

Mount Around Opening - Butt Corner
Mounted around the opening with butt corner. Mount on the exterior or interior.

Mount Around Opening - Miter Corner
Mounted around the opening with miter corner. Mount on the exterior or interior.
INSIDE THE OPENING
As the installation name implies, the extrusion is installed within or “inside” the opening. The extrusions can be mounted at any point within the opening provided enough room exists for screen installation. The extrusion can face interior or exterior and the installation can be with miter or butt corners (or a combination of both if required).
AROUND THE OPENING
When installing the extrusion “around” the opening, the extrusion head will be located outside of the opening itself. This gives a picture frame effect, or reveal, which tends to be complimentary to most installations. The extrusion can face interior or exterior and the installation can be with miter or butt corners (or a combination of both if required).
Step 4: Width extrusions
- • Measure the width dimensions and cut extrusion to proper size
- • Test fit in your opening then predrill for mounting screws (Use the score line to position drill holes)
- • Place hole 1” from each end and then no more than 12” apart
- • Install the width extrusions
Step 5: Height extrusions
- • Measure your height dimensions and cut extrusion to proper size
- • Test fit in your opening then predrill for mounting screws (Use the score line to position drill holes)
- • Place hole 1” from each end and then no more than 12” apart
- • Install the height extrusions
Step 6: Screen installation
- • Screen installation is similar to traditional screen rolling
- • Watch Screen Installation Video (below) for complete screening instructions
- • Fabric screening (polyester, fiberglass, etc.) is recommended. Avoid metal screening
- • Screening pattern is top, bottom, prime hand side, non-prime hand side
- • Use only SNAPP® screen spline tool or 3/32" nylon equivalent
- • Use only new SNAPP® screen spline. (do not re-use spline when rescreening)
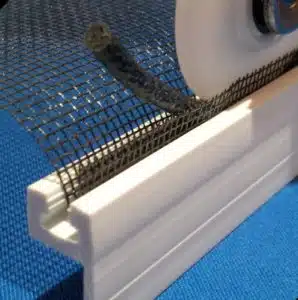
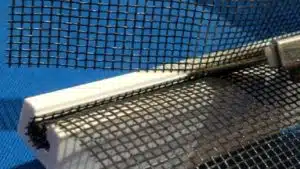
Roll screen in - then roll spline in.
(Watch center video below)
Step 7: Screen trimming
- • Run blade along the top edge of extrusion.
- • Trim location is the same for both sides of the extrusion
- • Use Caution: Aggressive or deep trimming will damage spline and/or weaken hold.
Watch the complete SNAPP® screen installation process below
- Other Information / Notes -
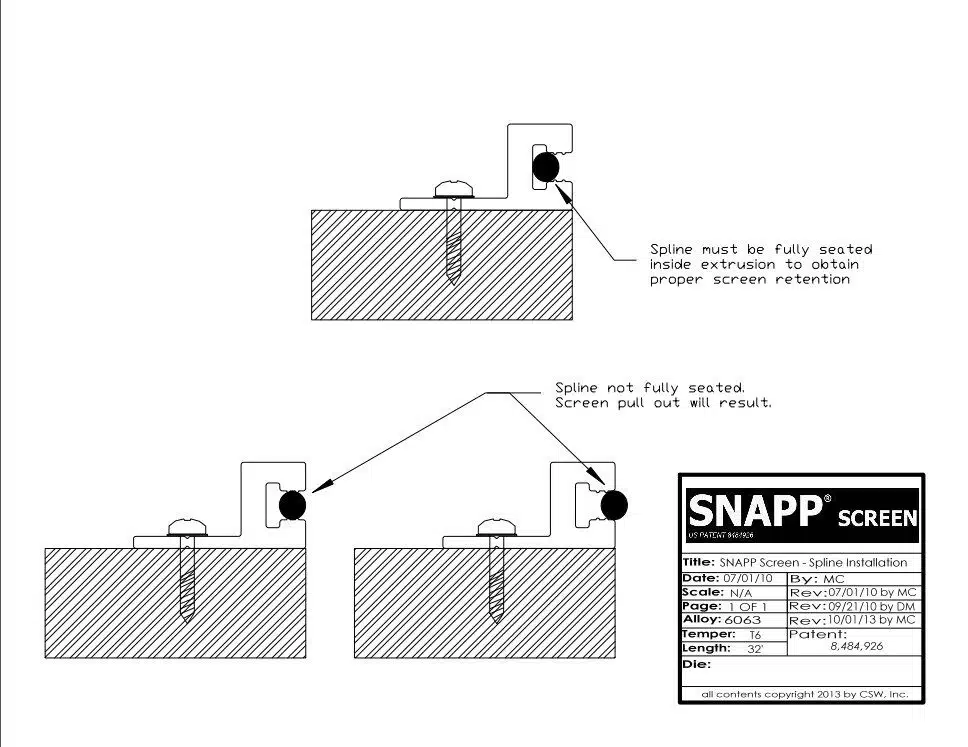
Spline / Spline Installation
SNAPP® screen spline (item: PF-014-500) must be used and fully seated within spline channel for proper hold. Use of other any other spline or failure to fully seat spline will result in screen pull out. Additionally, all spline tools are not the same, it is highly recommended that a SNAPP® screen spline installation tool (item: TL13) be used for spline installation. (see web store for more information on each item)
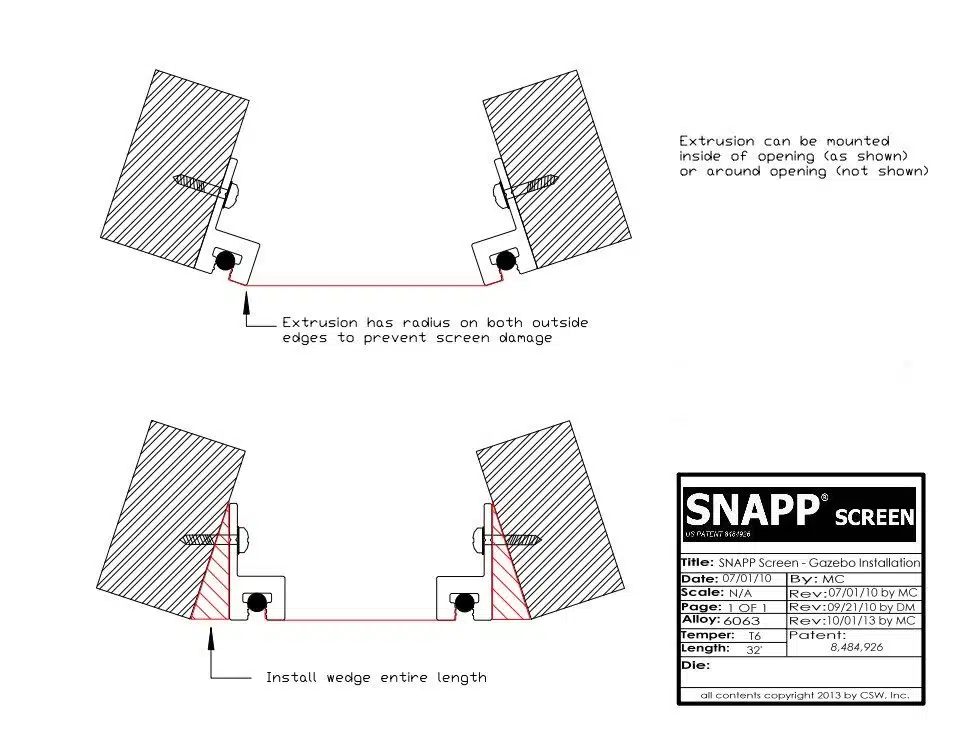
Gazebo Installations
Column faces will typically be angled away from each other in traditional gazebo installations. The extrusion can be mounted directly to the columns or a wedge can be installed first. Extrusion can be mounted “inside” or “around” the opening or as required to facilitate installation. Also see GAZEBO SCREENS for additional information.
Installing SNAPP® Screen in Arches / Radii
PVC: It is generally much easier to install the extrusion using the “around” the opening method. The PVC extrusion simply flexes easier. On a slow or long radius, the extrusion will fit with little effort. On fast or tight radii you may need to employ a heat gun to help soften the flange. You should also reduce the screw spacing to 6” or as needed for your application. The same points are true for “inside” the opening installations except that relief cuts may be required to compress the extrusion in fast or tight radii. Test fit the extrusion prior to determine the best installation method.
ALUMINUM: All points as noted above except that on fast or tight radii use of a commercial bender may be needed. Caution: When using a commercial bender, fast or tight radii bends may crack the applied powder coat finish. Best practice in these cases is to only bend unfinished (mill) extrusions and apply finish after bending -or- use the appropriate color matching PVC extrusion in the arch location(s).
Much more information is available here: Arches
Other Notes
- SNAPP® screen is designed to be installed by an average person with common tools (The DIY'er).
- SNAPP® screen is incredibly easy to repair if your screen material ever develops holes or tears. All you’ll need to do is pull out the SNAPP® screen retainer spline and remove the screen material. Next, install new screen material and new screen retainer spline in the same frame.
- One of the greatest features of SNAPP® screen is that it is specifically designed to be butted together. Opening width or height doesn't matter with respect to stock extrusion size ... just cut the extrusion as needed and butt pieces together. SNAPP® screen is a zero waste product so every inch of product is usable.
- Aluminum SNAPP® screen and PVC SNAPP® screen extrusions are color matched so they can be used together whenever needed.
- SNAPP® screen was specifically designed to be used with modern and super strong polyester screen materials. SNAPP® screen will accept all standard polyester and fiberglass screening materials, most sunshade materials, thin (.008 or less) PVC plastic or films, and other fabrics. Additionally, while standard .011g (or thinner) aluminum can be installed, it is not at all recommended ... Installation can be extremely difficult even if you are fully skilled in screen installation. Bronze, copper, stainless, etc are all too stiff and should be avoided completely.
Still not sure ? Jump over to our YouTube page and see what our great customers think
about SNAPP® screen and their completed DIY porch screen projects
SNAPP® screen YouTube Page
Be sure to look at our other situational help installation pages.
Dealing with columns, capitals, and bases
Installing onto wood, brick, stone, tile or concrete floors
How to screen arches or circles
Screening your gazebo
Select your screen material
How to paint extrusions
SNAPP® screen specifications
Common questions
Click drop down menu above for additional pages.
Be sure to look at our other inspirational pages.
Screen Porch Projects
Beachfront & Shoreline Screen Porches
Top Screened In Porch Design Ideas
Screen Porch Photos
Screen Porch Videos from Customers
Click drop down menu above for additional pages.

Warning: Follow all common and accepted safety practices and ensure that you're proficient in the proper and safe operation of any tool, equipment or procedures required to install SNAPP® screen.
Warning: SNAPP® screen is a “build in place” / “screen in place” insect screening system and will not provide fall prevention. Further, insect screenings only intended use is to reasonably stop insects from entering the covered opening. The misuse of insect screen may lead to injury or death. SNAPP® screen will not stop persons, children, animals, or alike from falling out of or entering through the insect screen covered opening.